STRUTSIndex
MVC (MODEL-VIEW-CONTROLLER)The main aim of the MVC architecture is to separate the business logic and application data from the presentation data to the user. Here are the reasons why we should use the MVC design pattern.
Flexibility in large component based systems raise questions on how to organize a project for easy and maintenance while protecting your data and reputation, especially from new developers and unwitting users. The answer is in using the Model, View, Control architecture. Architecture such as MVC is a design pattern that describes a recurring problem and its solution where the solution is never exactly the same for every recurrence. To use the Model-View-Controller MVC paradigm effectively you must understand the division of labor within the MVC triad. You also must understand how the three parts of the triad communicate with each other and with other active views and controllers; the sharing of a single mouse, keybord and display screen among several applications demands communication and cooperation. To make the best use of the MVC paradigm you need also to learn about the available subclasses of View and Controller which provide ready made starting points for your applications. In the MVC design pattern, application flow is mediated by a central controller. The controller delegates requests to an appropriate handler. The controller is the means by which the user interacts with the web application. The controller is responsible for the input to the model. A pure GUI controller accepts input from the user and instructs the model and viewport to perform action based on that input. If an invalid input is sent to the controller from the view, the model informs the controller to direct the view that error occurred and to tell it to try again. A web application controller can be thought of as specialised view since it has a visual aspect. It would be actually be one or more HTML forms in a web application and therefore the model can also dictate what the controller should display as input. The controller would produce HTML to allow the user input a query to the web application. The controller would add the necessary parameterisation of the individual form element so that the Servlet can observe the input. This is different from a GUI, actually back-to-front, where the controller is waiting and acting on event-driven input from mouse or graphics tablet. The controller adapts the request to the model. The model represents, or encapsulates, an application's business logic or state. It captures not only the state of a process or system, but also how the system works. It notifies any observer when any of the data has changed. The model would execute the database query for example. Control is then usually forwarded back through the controller to the appropriate view. The view is responsible for the output of the model. A pure GUI view attaches to a model and renders its contents to the display addition, when the model changes, the viewport automatically redraws the affected part of the image to reflect those changes. A web application view the state of the model into readable HTML. The forwarding can be implemented by a lookup in a mapping in either a database or a file. This provides a loose coupling between the model and the view, which can make an application much easier to write and maintain. Features of MVC1:
Features of MVC2:
 By dividing the web into a Model, View, and Controller we can, therefore, separates the presentation from the business logic. If the MVC architecture is designed purely, then a Model have multiple views and controllers. Also note that the model does not necessarily have to be a Java Servlet. In fact a single Java Servlet can offer multiple models. The Java Servlet is where you would place security login, user authentication and database pooling for example. After all these latter have nothing to do with the business logic of the web application or the presentation. MVC in Java Server PagesNow that we have a convenient architucture to separate the view, how can we leverage that? Java Server Pages (JSP) becomes more interesting because the HTML content can be separated from the Java business objects. JSP can also make use of Java Beans. The business logic could be placed inside Java Beans. If the design is architected correctly, a Web Designer could work with HTML on the JSP site without interfering with the Java developer. The Model/View/Controller architecture also works with JSP. In fact it makes the initial implementation a little easier to write. The controller object is master Servlet. Every request goes through the controller who retrieves the necessary model object. The model may interact with other business entities such as databases or Enterprise Java Beans (EJB). The model object sends the output results back to the controller. The controller takes the results and places it inside the web browser session and forwards a redirect request to a particular Java Server Page. The JSP, in the case, is the view. 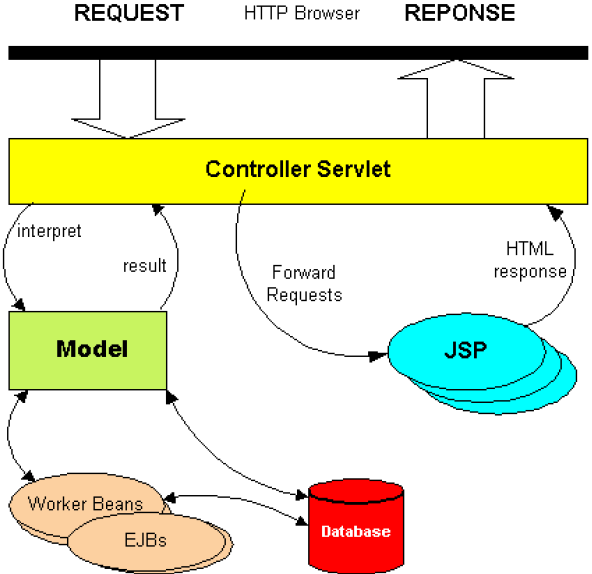 The controller has to bind a model and a view, but it could be any model and associated any view. Therein lies the flexibility and perhaps an insight to developing a very advanced dynamic controller that associates models to a view. The prior sections have concentrated on their being one controller, one model, and one view. In practice, multiple controllers may exist - but only one controls a section of the application at a time. For example, the administrator's functions may be controlled by one controller and the main logic controlled by another. Since only one controller can be in control at a given time, they must communicate. There may also be multiple models - but the controller takes the simplified view representation and maps it to the models appropriately and also translates that response back to the view. The view never needs to know how the logic is implemented. The case for separating presentation and logicDecoupling data presentation and the program implementation becomes beneficial since a change to one does not affect the other. This implies that both can be developed separately from the other: a division of labor. The look and feel of the web application, the fonts, the colours and the layout can be revised without having to change any Java code. As it should be. Similarly if the business logic in the application changes, for instance to improve performance and reliability, then this should not cause change in the presentation. A model-view-controller based web application written with only Java Servlets would give this decoupling. If the presentation changed then the Java code that generates the HTML, the presentation, in the view object only has to change. Similarly if the business logic changed then only the model object has to change. A web application built with MVC and Java Server Pages would be slightly easier if the business logic is contained only in Java Beans. The presentation (JSP) should only access these beans through custom tag libraries. This means that the Java Beans did not have Java code that wrote HTML. Your beans would only concern themselves with the business logic and not the presentation. The JSP would get the data from the Beans and then display the presentation (the "view"). Decoupling is therefore easy. A change to the implementation only necessitates changes to the Java Beans. A change to the presentation only concern changes to the relevant Java Server Page. With Java Server Pages a web designer who knows nothing about Java can concentrate on the HTML layout, look and feel. While a Java developer can concentrate on the Java Beans and the core logic of the web application. STRUTSStruts is an open source framework used for developing J2EE web applications using Model View Controller (MVC) design pattern. It uses and extends the Java Servlet API to encourage developers to adopt an MVC architecture. Struts framework provides three key components:
Struts provides you the basic infrastructure for implementing MVC allowing the developers to concentrate on the business logic. The Struts framework is composed of approximately and interfaces which are organized in about 12 top level packages. Along with the utility and helper classes framework also provides the classes and interfaces for working with controller and presentation by the help of the custom on to us which model we want to choose. The view of the Struts architecture is given below: The Struts Controller Components:Whenever a user request for then the request is handled by the Struts Action Servlet. When the ActionServlet receives the request, it intercepts the URL and based on the Struts Configuration files, it gives the handling of the request to the Action class. Action class is a part of the controller and is responsible for communicating with the model layer. The Struts View Components:The view components are responsible for presenting information to the users and accepting the input from them. They are responsible for displaying the information provided by the model components. Mostly we use the Java Server Pages for the view presentation. To extend the capability of the view we can use the Custom tags, java script etc. The Struts model component:The model components provides a model of the business logic behind a Struts program. It provides interfaces to databases or back- ends systems. Model components are generally a java class. There is not any such defined format for a Model component, so it is possible for us to reuse Java code which are written for other projects. We should choose the model according to our client requirement. How Struts Works:The basic purpose of the Java Servlets in struts is to handle requests made by the client or by web browsers. In struts JavaServerPages are used to design the dynamic web pages. In struts, servlets helps to route request which has been made by the web browsers to the appropriate ServerPage. The use of servlet as a router helps to make the web applications easier to design, create, and maintain. Struts is purely based on the MVC design pattern. It is one of the best and most well developed design patterns in use. By using the MVC architecture we break the processing in three sections named Model, the View, and the Controller. Below we are describing the working of struts.
1. As we all are well aware of the fact that each application we develop has a
deployment descriptor i.e. WEB-INF/web.xml. This is the file which the container
reads. This file has all the configuration information which we have defined for our web
application. The configuration information includes the index file, the default welcome
page, the mapping of our servlets including path and the extension name, any init
parameters, information related to the context elements.In the file WEB-INF/web.xml of
struts application we need to configure the Struts ActionServlet which handles all the
request made by the web browsers to a given mapping. ActionServlet is the central
component of the Struts controller. This servlet extends the HttpServlet. This servlet
basically performs two important things. First is: When the container gets start, it reads
the Struts Configuration files and loads it into memory in the init() method. You will
know more about the Struts Configuration files below. Second point is: It intercepts the HTTP request in the doGet() and doPost() method and handles it appropriately. 2. In struts application we have another xml file which is a Struts configuration file named as struts.config.xml. The name of this file can be changed. The name of the struts configuration file can be configured in the web.xml file. This file is placed under the WEB-INF directory of the web application. It is an XML document that describes all or part of Struts application. This file has all the information about many types of Struts resources and configures their interaction. This file is used to associate paths with the controller components of your application, known as Action classes like <action path ="/login" type = "LoginAction"> This tag tells the Struts ActionServlet that whenever the incoming request is http://myhost/myapp/login.do, then it must invoke the controller component LoginAction. Above, you can see that we have written .do in the URL. This mapping is done to tell the web application that whenever a request is received with the .do extension then it should be appended to the URL. 3. For each action we also have to configure Struts with the names of the resulting pages that will be shown as a result of that action. In our application there can be more than one view which depends on the result of an action. One can be for a success and the other for the failure. If the result action is "success" then the action tells the ActionServlet that the action has been successfully accomplished or vice- versa. The struts knows how to forward the specific page to the concerned destination. The model which we want to use is entirely to you, the model is called from within the controller components. 4. Action can also get associate with a JavaBean in our Struts configuration file. Java bean is nothing but a class having getter and setter methods that can be used to communicate between the view and the controller layer. These java beans are validated by invoking the validate() method on the ActionForm by the help of the Struts system. The client sends the request by the normal form submission by using Get or Post method, and the Struts system updates that data in the Bean before calling the controller components. 5.The view we use in the struts can be either Jsp page, Velocity templates, XSLT pages etc. In struts there are set of JSP tags which has been bundled with the struts distribution, but it is not mandatory to use only Jsp tags, even plain HTML files can be used within our Struts application but the disadvantage of using the html is that it can't take the full advantage of all the dynamic features provided in the struts framework.The framework includes a set of custom tag libraries that facilitate in creating the user interfaces that can interact gracefully with ActionForm beans. The struts Jsp taglibs has a number of generic and struts specific tags tags which helps you to use dynamic data in your view. These tags helps us to interact with your controller without writing much java code inside your jsp. These tags are used create forms, internally forward to other pages by interacting with the bean and helps us to invoke other actions of the web application. There are many tags provided to you in the struts frameworks which helps you in sending error messages, internationalization etc. Note: The points we have described above will be in effect if and only if when the ActionServlet is handling the request. When the request is submitted to the container which call the ActionServlet, make sure that the extension of the file which we want to access should have the extension .do. Struts working: Process flow:web.xml: Whenever the container gets start up the first work it does is to check the web.xml file and determine what struts action Servlets exist. The container is response ble for mapping all the file request to the correct action Servlet. A Request: This is the second step performed by the container after checking the web.xml file. In this the user submits a form within a browser and the request is interce pted by the controller. The Controller: This is the heart of the container. Most Struts application will have only one controller that is ActionServlet which is responsible for directing several Actions. The controller determines what action is required and sends the information to be processed by an action Bean. The key advantage of having a controller is its ability to control the flow of logic through the highly controlled, centralized points. struts.config.xml: Struts has a configuration file to store mappings of actions. By using this file there is no need to hard code the module which will be called within a component. The one more responsibility of the controller is to check the struts-config .xml file to determine which module to be called upon an action request. Struts only reads the struts-config.xml file upon start up. Model: The model is basically a business logic part which takes the response from the user and stores the result for the duration of the process. This is a great place to perform the preprocessing of the data received from request. It is possible to reuse the same model for many page requests. Struts provides the ActionForm and the Action classes which can be extended to create the model objects. View:The view in struts framework is mainly a jsp page which is responsible for produ cing the output to the user. Struts tag libraries:These are struts components helps us to integrate the struts framework within the project's logic. These struts tag libraries are used within the JSP page. This means that the controller and the model part can't make use of the tag library but instead use the struts class library for strut process control. Property file:It is used to store the messages that an object or page can use. Proper ties files can be used to store the titles and other string data. We can create many prope rty files to handle different languages. Business objects:It is the place where the rules of the actual project exists. These are the modules which just regulate the day- to- day site activities. The Response:This is the output of the View JSP object. The Struts Architecture: The Struts Controller ComponentsWhen a request is sent to a Struts application, it's handled by the Struts ActionServlet. The Struts framework includes a concrete ActionServlet that for many users is adequate and requires no customization or additional work. When the ActionServlet receives a request, it inspects the URL and based on the Struts configuration files, it delegates the handling of the request to an Action class. The Action class is part of the controller and is responsible for communicating with the model layer. The Struts framework provides an abstract Action class that you must extend for your own needs. Understanding Struts ControllerHere I will describe you the Controller part of the Struts Framework. I will show you how to configure the struts-config.xml file to map the request to some destination servlet or jsp file. The class org.apache.struts.action.ActionServlet is the heart of the Struts Framework. It is the Controller part of the Struts Framework. ActionServlet is configured as Servlet in the web.xml file as shown in the following code snippets. <servlet> <servlet-name>action</servlet-name> <servlet-class>org.apache.struts.action.ActionServlet</servlet-class> <init-param> <param-name>config</param-name> <param-value>/WEB-INF/struts-config.xml</param-value> </init-param> <load-on-startup>2</load-on-startup> </servlet> This servlet is responsible for handing all the request for the Struts Framework, user can map the specific pattern of request to the ActionServlet. <servlet-mapping> tag in the web.xml file specifies the url pattern to be handled by the servlet. By default it is *.do, but it can be changed to anything. Following code form the web.xml file shows the mapping. <servlet-mapping> <servlet-name>action</servlet-name> <url-pattern>*.do</url-pattern> </servlet-mapping> The above mapping maps all the requests ending with .do to the ActionServlet. ActionServlet uses the configuration defined in struts-config.xml file to decide the destination of the request. Action Mapping Definitions (described below) is used to map any action. For this lesson we will create Welcome.jsp file and map the "Welcome.do" request to this page. Welcome.jsp <%@ taglib uri="/tags/struts-bean" prefix="bean" %> <%@ taglib uri="/tags/struts-html" prefix="html" %> <html:html> <body bgcolor="white"> <h3><bean:message key="welcome.heading"/></h3> <p><bean:message key="welcome.message"/></p> </body> </html:html>Forwarding the Welcome.do request to Welcome.jsp The "Action Mapping Definitions" is the most important part in the struts-config.xml. This section takes a form defined in the "Form Bean Definitions" section and maps it to an action class. Following code under the <action-mappings > tag is used to forward the request to the Welcome.jsp. <action path="/Welcome" forward="/pages/Welcome.jsp"/>To call this Welcome.jsp file we will use the following code. <html:link page="/Welcome.do">First Request to the controller</html:link> Once the use clicks on First Request to the controller link on the index page, request (for Welcome.do) is sent to the Controller and the controller forwards the request to Welcome.jsp. The content of Welcome.jsp is displayed to the user. The ActionForm ClassHere we will learn about the ActionForm in detail. I will show you a good example of ActionForm. This example will help you understand Struts in detail. We will create user interface to accept the address details and then validate the details on server side. On the successful validation of data, the data will be sent to model (the action class). In the Action class we can add the business processing logic but in this case we are just forwarding it to the sucess.jsp.What is ActionForm ?Any java class that that extends from org.apache.struts.action.ActionForm is called ActionForm. ActionForm maintains the session state for web application and the ActionForm object is automatically populated on the server side with data entered from a form on the client side. We will first create the class LoginForm which extends the ActionForm class.Here is the code of the class:
LoginForm.java

package com.soft.login;
import org.apache.struts.action.ActionForm;
public class LoginForm extends ActionForm {
private String username=null;
private String password=null;
public void setUsername(String username)
{
this.username = username;
}
public String getUsername()
{
return username;
}
public void setPassword(String password)
{
this.password = password;
}
public String getPassword()
{
return password;
}
}
public void reset(ActionMapping mapping, HttpServletRequest request)
{
this.name=null;
this.address=null;
this.emailAddress=null;
}
public ActionErrors validate(ActionMapping mapping, HttpServletRequest request )
{
ActionErrors errors = new ActionErrors();
if( usename==null || username.equals("")) {
 errors.add("username",new ActionMessage("error.username"));
}
if( password==null || password.equals("")) {
errors.add("password",new ActionMessage("error.password"));
}
return errors;
}
The above class populates the Login Form data and validates it. The validate() method is used to validate the inputs. If any or all of the fields on the form are blank, error messages are added to the ActionMapping object. Note that we are using ActionMessage class, ActionError is now deprecated and will be removed in next version. DynaActionFormHere you will learn how to create Struts DynaActionForm. We will recreate our address form with Struts DynaActionForm. DynaActionForm is specialized subclass of ActionForm that allows the creation of form beans with dynamic sets of properties, without requiring the developer to create a Java class for each type of form bean. DynaActionForm eliminates the need of FormBean class and now the form bean definition can be written into the struts-config.xml file. So, it makes the FormBean declarative and this helps the programmer to reduce the development time.In this session we will recreate the add form with the help of DynaActionForm. It also shows you how you can validate use input in the action class. Adding DynaActionForm Entry in struts-config.xmlFirst we will add the necessary entry in the struts-config.xml file. Add the following entry in the struts-config.xml file. The form bean is of org.apache.struts.action. DynaActionForm type. The <form-property/> tag is used to define the property for the form bean. We have defined three properties for our dynamic form bean. <form-bean name="DynaAddressForm" type="org.apache.struts.action.DynaActionForm"> <form-property name="name" type="java.lang.String"/> <form-property name="address" type="java.lang.String"/> <form-property name="email" type="java.lang.String" /> </form-bean>Adding action mapping Add the following action mapping in the struts-config.xml file: <action path="/DynaAddress" type=" com.soft.struts.AddressDynaAction" name="DynaAddressForm" scope="request" validate="true" input="/pages/DynaAddress.jsp"> <forward name="success" path="/pages/success.jsp"/> <forward name="invalid" path="/pages/DynaAddress.jsp" /> </action>Creating Action Class Code for action class is as follows:
package com.soft.struts;
import javax.servlet.http.*
import org.apache.struts.action.*;
public class AddressDynaAction extends Action
{
public ActionForward execute(ActionMapping mapping, ActionForm form,
HttpServletRequest request, HttpServletResponse response) throws Exception
{
DynaActionForm addressForm = (DynaActionForm)form;
//Create object of ActionMesssages
ActionMessages errors = new ActionMessages();
//Check and collect errors
if(((String)addressForm.get("name")).equals("")) {
errors.add("name",new ActionMessage("error.name.required"));
if(((String)addressForm.get("address")).equals("")) {
errors.add("address",new ActionMessage("error.address.required"));
}
}
Creating the JSP file We will use the Dyna Form DynaAddressForm created above in the jsp file. Here is the code of the jsp(DynaAddress.jsp) file. <%@ taglib uri="/tags/struts-bean" prefix="bean" %> <%@ taglib uri="/tags/struts-html" prefix="html" %> <html:html> <body bgcolor="white"> <html:form action="/DynaAddress" method="post"> <table> <tr> <td align="center" colspan="2"> <font size="4">Please Enter the Following Details</font> </tr> <tr> <td align="left" colspan="2"> <font color="red"><html:errors/></font> </tr> <tr> <td align="right">Name</td> <td align="left"> <html:text property="name" size="30" maxlength="30"/> </td> </tr> <tr> <td align="right">Address</td> <td align="left"> <html:text property="address" size="30" maxlength="30"/> </td> </tr> <tr> <td align="right">E-mail address</td> <td align="left"> <html:text property="email" size="30" maxlength="30"/> </td> </tr> <tr> <td align="right"><html:submit>Save</html:submit> </td> <td align="left"><html:cancel>Cancel</html:cancel></td> </tr> </table> </html:form> </body> </html:html>Add the following line in the index.jsp to call the form. <li> <html:link page="/pages/DynaAddress.jsp">Dyna Action Form Example</html:link > Example shows you how to use DynaActionForm. </li> Action ClassWhat is Action Class ?Any java class which extends from org.apache.struts.action.Action is called Action Class. Action class acts as wrapper around the business logic and provides an interface to the application's Model layer. It acts as glue between the View and Model layer. It also transfers the data from the view layer to the specific business process layer and finally returns the processed data from business layer to the view layer.An Action works as an adapter between the contents of an incoming HTTP request and the business logic that corresponds to it. Then the struts controller (ActionServlet) selects an appropriate Action and creates an instance if necessary, and finally calls execute method. To use the Action, we need to Subclass and overwrite the execute() method. In the Action Class don't add the business process logic, instead move the database and business process logic to the process or dao layer. The ActionServlet (commad) passes the parameterized class to Action Form using the execute() method. The return type of the execute method is ActionForward which is used by the Struts Framework to forward the request to the file as per the value of the returned ActionForward object. Developing our Action Class ?
Our Action class (Loginction.java) is simple class that only forwards the
TestAction.jsp. Our Action class returns the ActionForward called "testAction", which is
defined in the struts-config.xml file (action mapping is show later in this page). Here is code of our Action Class:
LoginAction.java

package com.soft.login;
import javax.servlet.http.*;
import org.apache.struts.action.*;
public class LoginAction extends Action
{
public ActionForward execute(ActionMapping mapping,ActionForm
form,HttpServletRequest request,HttpServletResponse response)throws Exception
{
LoginForm loginform = (LoginForm)form;
String user = loginform.getUsername();
String pass = loginform.getPassword();
if(user.equals("ramesh") && pass.equals("soft"))
return mapping.findForward("success");
else
return mapping.findForward("failure");
}
}
Understanding Action ClassHere is the signature of the Action Class. public ActionForward execute(ActionMapping mapping,ActionForm form,HttpServlet Request request,HttpServletResponse response) throws java.lang.Exception Action Class process the specified HTTP request, and create the corresponding HTTP response (or forward to another web component that will create it), with provision for handling exceptions thrown by the business logic. Return an ActionForward instance describing where and how control should be forwarded, or null if the response has already been completed. Parameters:mapping - The ActionMapping used to select this instance form - The optional ActionForm bean for this request (if any) request - The HTTP request we are processing response - The HTTP response we are creating Throws:Action class throws java.lang.Exception - if the application business logic throws an exception Following code under the <action-mappings> tag is used to for mapping the TestAction class. <action path="/login" name="loginform" type="com.soft.login.LoginAction"> <forward name="testAction" path="/pages/TestAction.jsp"/> </action> The RequestProcessorHow a Request is ProcessedActionServlet is the only servlet in Struts framework, and is responsible for handling all of the requests. Whenever it receives a request, it first tries to find a subapplication for the current request. Once a sub-application is found, it creates a RequestProcessor object for that sub-application and calls its process() method by passing it HttpServletRequest and HttpServletResponse objects.
The RequestProcessor.process() is where most of the request processing takes
place. The process() method is implemented using the Template Method design pattern,
in which there is a separate method for performing each step of request processing, and
all of those methods are called in sequence from the process() method.
public void process(HttpServletRequest request, HttpServletResponse response)
throws IOException, ServletException
{
// Wrap multipart requests with a special wrapper
request = processMultipart(request);
// Identify the path component we will use to select a mapping
String path = processPath(request, response);
if (path == null) {
return;
}
if (log.isDebugEnabled()) {
log.debug("Processing a '" + request.getMethod() +"' for path '" + path + "'");
}
// Select a Locale for the current user if requested
processLocale(request, response);
// Set the content type and no-caching headers if requested
processContent(request, response);
processNoCache(request, response);
// General purpose preprocessing hook
if (!processPreprocess(request, response)) {
return;
}
// Identify the mapping for this request

ActionMapping mapping =
processMapping(request, response, path);
if (mapping == null) {
return;
}
// Check for any role required to perform this action
if (!processRoles(request, response, mapping)) {
return;
}
// Process any ActionForm bean related to this request
ActionForm form = processActionForm(request, response, mapping);
processPopulate(request, response, form, mapping);
if (!processValidate(request, response, form, mapping)) {
return;
}
// Process a forward or include specified by this mapping
if (!processForward(request, response, mapping)) {
return;
}
if (!processInclude(request, response, mapping)) {
return;
}
// Create or acquire the Action instance to process this request
Action action = processActionCreate(request, response, mapping);
if (action == null) {
return;
}
// Call the Action instance itself
ActionForward forward =
processActionPerform(request, response, action, form, mapping);
// Process the returned ActionForward instance
processForwardConfig(request, response, forward);
}
The above list explains what the default implementation of RequestProcessor does at
every stage of request processing and the sequence in which various steps are
executed. As you can see, RequestProcessor is very flexible and it allows you to
configure it by setting properties in the <controller> element. For example, if your application is going to generate XML content instead of HTML, then you can inform Struts about this by setting a property of the controller element. Creating Your own RequestProcessor:Above, we saw how the default implementation of RequestProcessor works. Now we will present a example of how to customize it by creating our own custom RequestProcessor. To demonstrate creating a custom RequestProcessor, we will change our sample application to implement these two business requirements:
Create your own CustomRequestProcessor class, which will extend the RequestProcessor class, like this:
2. public class CustomRequestProcessor
3. extends RequestProcessor {
4. protected boolean processPreprocess (
5. HttpServletRequest request,
6. HttpServletResponse response) {
7. HttpSession session = request.getSession(false);
8. //If user is trying to access login page
9. // then don't check
10. if( request.getServletPath().equals("/loginInput.do")
11. || request.getServletPath().equals("/login.do") )
12. return true;
13. //Check if userName attribute is there is session.
14. //If so, it means user has allready logged in
15. if( session != null &&
16. session.getAttribute("userName") != null)
17. return true;
18. else{
19. try{
20. //If no redirect user to login Page
21. request.getRequestDispatcher
22. ("/Login.jsp").forward(request,response);
23. }catch(Exception ex){
24. }
25. }
26. return false;
27. }
28.
29. protected void processContent(HttpServletRequest request,
30. HttpServletResponse response) {
31. //Check if user is requesting ContactImageAction
32. // if yes then set image/gif as content type
33. if( request.getServletPath().equals("/contactimage.do")){
34. response.setContentType("image/gif");
35. return;
36. }
37. super.processContent(request, response);
38. }
39. }
In the processPreprocess method of our CustomRequestProcessor class, we are checking for the userName attribute of the session and if it's not found, redirect the user to the login page. For our requirement of generating images as output from the ContactImageAction class, we have to override the processContent method and first check if the request is for the /contactimage path. If so, we set the contentType to image/gif; otherwise, it's text/html. Add these lines to your struts-config.xml file after the <action-mapping> element to inform Struts that CustomRequestProcessor should be used as the Request Processor class: <controller> <set-property property="processorClass" value="com.soft.CustomRequestProcessor"/> </controller> Please note that overriding processContent() is OK if you have very few Action classes where you want to generate output whose contentType is something other than text/html. If that is not the case, you should create a Struts subapplication for handling requests for image-generating Actions and set image/gif as the contentType for it. The Tiles framework uses its own RequestProcessor for decorating output generated by Struts. The org.apache.struts.action.RequestProcessor contains the logic that the Struts controller performs with each servlet request from the container. The RequestProcessor is the class that you will want to override when you want to customize the processing of the ActionServlet. Creating a New RequestProcessor :
Now that we have discussed what the RequestProcessor is, let's look at an example Plugin implementation.The RequestProcessor contains n-number of methods that you can override to change the behavior of the ActionServlet. To create your own RequestProcessor, you must follow the steps described in the following list:
protected boolean processPreprocess(HttpServletRequest request, HttpServletResponse response) The default implementation of the processPreprocess() method simply returns true, which tells the framework to continue its normal processing. You must return true from your overridden processPreprocess() method if you want to continue processing the request. Note: If you do choose to return false from the processPreprocess() method, then the RequestProcessor will stop processing the request and return control back to the doGet() or doPost() of the ActionServlet. To see how all of this really works, take a look at our example RequestProcessor implementation, which is listed in the following snippet.
Package com.soft;
import javax.servlet.http.HttpServletRequest;
import javax.servlet.http.HttpServletResponse;
import javax.servlet.http.HttpServlet;
import javax.servlet.ServletException;
import javax.servlet.http.Cookie;
import java.io.IOException;
import java.util.Enumeration;
import org.apache.struts.action.RequestProcessor;
public class CustomRequestProcessor extends RequestProcessor {
public CustomRequestProcessor() {
}
public boolean processPreprocess(HttpServletRequest request,
HttpServletResponse response) {
log("----------processPreprocess Logging--------------");
log("Request URI = " + request.getRequestURI());
log("Context Path = " + request.getContextPath());
Cookie cookies[] = request.getCookies();
if (cookies != null) {
for (int i = 0; i < cookies.length; i++) {
log("Cookie = " + cookies[i].getName() + " = " +
cookies[i].getValue());
}
}
Enumeration headerNames = request.getHeaderNames();
while (headerNames.hasMoreElements()) {
String headerName =
(String) headerNames.nextElement();
Enumeration headerValues =
request.getHeaders(headerName);
while (headerValues.hasMoreElements()) {
String headerValue =
(String) headerValues.nextElement();
log("Header = " + headerName + " = " + headerValue);
}
}
log("Locale = " + request.getLocale());
log ("Method = " + request.getMethod());
log ("Path Info = " + request.getPathInfo());
log("Protocol = " + request.getProtocol());
log("Remote Address = " + request.getRemoteAddr());
log("Remote Host = " + request.getRemoteHost());
log("Remote User = " + request.getRemoteUser());
log("Requested Session Id = "+ request.getRequestedSessionId());
log("Scheme = " + request.getScheme());
log("Server Name = " + request.getServerName());
log("Server Port = " + request.getServerPort());
log("Servlet Path = " + request.getServletPath());
log("Secure = " + request.isSecure());
log("-------------------------------------------------");
return true;
}
}
In our processPreprocess() method, we are retrieving the information stored in the request and logging it to the ServletContext log. Once the logging is complete, the processPreprocess() method returns the Boolean value true, and normal processing continues. If the processPreprocess() method had returned false, then the ActionServlet would have terminated processing, and the Action would never have been performed. Configuring an Extended RequestProcessorNow that you have seen a Plugin and understand how it can be used, let's take a look at how a Plugin is deployed and configured. To deploy and configure our application, you must Compile the new RequestProcessor and move it into the Web application's classpath.
Validator FrameworkStruts Framework provides the functionality to validate the form data. It can be use to validate the data on the users browser as well as on the server side. Struts Framework emits the java scripts and it can be used to validate the form data on the client browser. Server side validation of the form can be accomplished by sub classing your From Bean with DynaValidatorForm class. The Validator framework was developed by David Winterfeldt as third-party addon to Struts. Now the Validator framework is a part of Jakarta Commons project and it can be used with or without Struts. The Validator framework comes integrated with the Struts Framework and can be used without doing any extra settings. Using Validator FrameworkValidator uses the XML file to pickup the validation rules to be applied to an form. In XML validation requirements are defined applied to a form. In case we need special validation rules not provided by the validator framework, we can plug in our own custom validations into Validator. The Validator Framework uses two XML configuration files validator-rules.xml and validation.xml. The validator-rules.xml defines the standard validation routines, these are reusable and used in validation.xml. to define the form specific validations. The validation.xml defines the validations applied to a form bean. Structure of validator-rule.xmlThe validation-rules.xml is provided with the Validator Framework and it declares and assigns the logical names to the validation routines. It also contains the client-side javascript code for each validation routine. The validation routines are java methods plugged into the system to perform specific validations.Following table contains the details of the elements in this file:
The Validator plug-in (validator-rules.xml) is supplied with a predefined set of commonly used validation rules such as Required, Minimum Length, Maximum length, Date Validation, Email Address validation and more. This basic set of rules can also be extended with custom validators if required. Structure of validation.xmlThis validation.xml configuration file defines which validation routines that is used to validate Form Beans. You can define validation logic for any number of Form Beans in this configuration file. Inside that definition, you specify the validations you want to apply to the Form Bean's fields. The definitions in this file use the logical names of Form Beans from the struts-config.xml file along with the logical names of validation routines from the validator-rules.xml file to tie the two together.
Example of form in the validation.xml file: <form name="loginForm"> <field property="username" depends="required"> <arg key="logonForm.username"/> </field> <field property="password" depends="required,mask"> <arg key="logonForm.password"/> <var> <var-name>mask</var-name> <var-value>^[0-9a-zA-Z]*$</var-value> </var> </field> </form> The <html:javascript> tag to allow front-end validation based on the xml in validation.xml.
For example the code: <html:javascript formName="logonForm" dynamicJavascript="true" staticJavascript= "true" /> generates the client side java script for the form "logonForm" as defined in the validation.xml file. The <html:javascript> when added in the jsp file generates the client site validation script. Client Side Validation in StrutsHere we will create JSP page for entering the address and use the functionality provided by Validator Framework to validate the user data on the browser. Validator Framework emits the JavaScript code which validates the user input on the browser. To accomplish this we have to follow the following steps:
To enable the validator plug-in open the file struts-config.xml and make sure that following line is present in the file. <!-- Validator plugin --> <plug-in className="org.apache.struts.validator.ValidatorPlugIn"> <set-property property="pathnames" value="/WEB-INF/validator-rules.xml,/WEB-INF/validation.xml"/> </plug-in> Creating Message ResourcesMessage resources are used by the Validator Framework to generate the validation error messages. In our application we need to define the messages for name, Address and Email address. Open the \WEB-INF\MessageResources.properties file and add the following lines: AddressForm.name=Name AddressForm.address=Address AddressForm.emailAddress=E-mail address Developing Validation rulesIn this application we are adding only one validation that the fields on the form should not be blank. Add the following code in the validation.xml. <!-- Address form Validation--> <form name="AddressForm"> <field property="name" depends="required"> <arg key="AddressForm.name"/> </field> <field property="address" depends="required"> <arg key="AddressForm.address"/> </field> <field property="emailAddress" depends="required"> <arg key="AddressForm.emailAddress"/> </field> </form> The above definition defines the validation for the form fields name, address and emailAddress. The attribute depends="required" instructs the Validator Frame work to generate the JavaScript that checks that the fields are not left blank. If the fields are left blank then JavaScript shows the error message. In the error message the message are taken from the key defined in the <arg key=".."/> tag. The value of key is taken from the message resources (WEB-INF\MessageResources.properties). Applying Validation rules to JSP
Now create the AddressJavascriptValidation.jsp file to test the application. The code for AddressJavascriptValidation.jsp is as follows: <%@ taglib uri="/tags/struts-bean" prefix="bean" %> <%@ taglib uri="/tags/struts-html" prefix="html" %> <html:html> <head> <title><bean:message key="welcome.title"/></title> </head> <body bgcolor="white"> <html:form action="/AddressJavascriptValidation" method="post" onsubmit="return validateAddressForm(this);"> <div align="left"> <p> This application shows the use of Struts Validator.<br> The following form contains fields that are processed by Struts Validator.<br> Fill in the form and see how JavaScript generated by Validator Framework validates the form. </p> <p> <html:errors/> </p> <table> <tr> <td align="center" colspan="2"> <font size="4"><b>Please Enter the Following Details</b></font> </tr> <tr> <td align="right"><b>Name</b></td> <td align="left"><html:text property="name" size="30" maxlength="30"/></td> </tr> <tr> <td align="right"><b>Address</b></td> <td align="left"><html:text property="address" size="30" maxlength="30"/></td> </tr> <tr> <td align="right"><b>E-mail address</b></td> <td align="left"><html:text property="emailAddress" size="30" maxlength="30"/> </td> </tr> <tr> <td align="right"><html:submit>Save</html:submit></td> <td align="left"><html:cancel>Cancel</html:cancel></td> </tr> </table> </div> <!-- Begin Validator Javascript Function--> <html:javascript formName="AddressForm"/> <!-- End of Validator Javascript Function--> </html:form> </body> </html:html>
The code <html:javascript formName="AddressForm"/> is used to plug-in the
Validator JavaScript. <action path="/AddressJavascriptValidation" type="com.soft.AddressAction" name="AddressForm" scope="request" validate="true" input="/pages/AddressJavascriptValidation.jsp"> <forward name="success" path="/pages/success.jsp"/> </action>Add the following line in the index.jsp to call the form.
<li>
<html:link page="/pages/AddressJavascriptValidation.jsp">Client Side Validation
for Address Form</html:link>
Struts Framework provides the functionality to validate the form data. It can be use to validate the data on the users browser as well as on the server side. Struts Framework emits the java scripts and it can be used validate the form data on the client browser. Server side validation of form can be accomplished by sub classing your From Bean with DynaValidatorForm class Creating Custom Validators in STRUTSStruts Validator framework provides many validation rules that can be used in the web applications. If you application needs special kind of validation, then you can extend the validator framework to develop your own validation rule. The client-side validation in Struts is well known. Here are some of the available features:
These are found in the validator-rules.xml inside the <validator> tags. The validatorrules. xml file is found in the commons-validator jar. Let us know create a new validator for entering the name field of a form. The form should accept only "administrator" for the name field. To accomplish this edit the validator-rules.xml and add the following code under the <global> tag:
<validator name="matchname"
classname="org.apache.struts.validator.FieldChecks"
method="validateName"
methodParams="java.lang.Object,
org.apache.commons.validator.ValidatorAction,
org.apache.commons.validator.Field,
org.apache.struts.action.ActionMessages,
org.apache.commons.validator.Validator,
javax.servlet.http.HttpServletRequest"
msg="errors.name">
<javascript><![CDATA[
function validateName(form) {
var isValid = true;
var focusField = null;
var i = 0;
var fields = new Array();
var omatchName= eval('new ' + jcv_retrieveFormName(form) + '_matchname()
');
for (var x in omatchName) {
if (!jcv_verifyArrayElement(x, omatchName[x])) {
continue;
}
var field = form[omatchName[x][0]];
if (!jcv_isFieldPresent(field)) {
fields[i++] = omatchName[x][1];
isValid=false;
} else if (field.value != "administrator") {
fields[i++]=omatchName[x][1];
isValid=false;
}
}
if (fields.length > 0) {
jcv_handleErrors(fields, focusField);
}
return isValid;
}
]]>
</javascript>
</validator>
To understand the above code:
<!-- Name form Validation-->
<form-validation>
<formset>
<form name="AdminForm">
<field property="name"
depends="matchname">
<arg0 key="AddressForm.name"/>
</field>
</form>
</formset>
</form-validation>
Copy the files validation.xml and validator-rules.xml to the directory where your struts-config.xml resides. Let us say it is WEB-INF. Next we have to create the error message for errors.name. Create a directory WEB-INF/resources and a file in this directory with the name application.properties. Add the following lines to application.properties
AdminForm.name=Name
errors.name={0} should be administrator.
errors.required={0} is required.
errors.minlength={0} can not be less than {1} characters.
errors.maxlength={0} can not be greater than {1} characters.
errors.invalid={0} is invalid.
errors.byte={0} must be a byte.
errors.short={0} must be a short.
errors.integer={0} must be an integer.
errors.long={0} must be a long.
errors.float={0} must be a float.
errors.double={0} must be a double.
errors.date={0} is not a date.
errors.range={0} is not in the range {1} through {2}.
errors.creditcard={0} is an invalid credit card number.
errors.email={0} is an invalid e-mail address.
Edit struts-configuration.xml and add the following lines
<form-bean name="AdminForm" type="test.AdminForm"/>
<action
path="/AdminFormValidation"
type="test.AdminForm"
name="AdminForm"
scope="request"
validate="true"
input="admin.jsp">
<forward name="success" path="success.jsp"/>
</action>
<message-resources parameter="resources/application"/>
<plug-in className="org.apache.struts.validator.ValidatorPlugIn">
<set-property property="pathnames"
value="/WEB-INF/validator-rules.xml,/WEB-INF/validation.xml"/>
</plug-in>
Create a JSP file as follows: <%@ taglib uri="struts-bean.tld" prefix="bean" %> <%@ taglib uri="struts-html.tld" prefix="html" %> <html:html> <body bgcolor="white"> <html:form action="/AdminFormValidation" method="post" onsubmit="return validateAdminForm(this);"> <div align="left"> <p> This application shows the use of Struts Validator.<br> The following form contains fields that are processed by Struts Validator.<br> Fill in the form and see how JavaScript generated by Validator Framework validates the form. </p> <p> <html:errors/> </p> <table> <tr> <td align="right"><b>Name</b></td> <td align="left"> <html:text property="name" size="30" maxlength="30"/></td> </tr> <tr> <td align="right"> <html:submit>Save</html:submit></td> <td align="left"> <html:cancel>Cancel</html:cancel> </td> </tr> </table> </div> <!-- Begin Validator Javascript Function--> <html:javascript formName="AddressForm"/> <!-- End of Validator Javascript Function--> </html:form> </body> </html:html>Then we create the success.jsp <% out.println("SUCCESS") %> Then we create the AdminForm
package com.soft;
import javax.servlet.http.HttpServletRequest;
import org.apache.struts.action.*;
public class AdminForm extends ActionForm
{
private String name=null;
public void setName(String name)
{
this.name=name;
}
public String getName()
{
return this.name;
}
public void reset(ActionMapping mapping, HttpServletRequest request)
{
this.name=null;
}
public ActionErrors validate(ActionMapping mapping, HttpServletRequest request )
{
ActionErrors errors = new ActionErrors();
if( getName() == null || getName().length() < 1 )
{
errors.add("name",new ActionMessage("error.name.required"));
}
return errors;
}
}
Create the AdminAction.java
package com.soft;
import javax.servlet.http.HttpServletRequest;
import javax.servlet.http.HttpServletResponse;
import org.apache.struts.action.Action;
import org.apache.struts.action.ActionForm;
import org.apache.struts.action.ActionForward;
import org.apache.struts.action.ActionMapping;
public class AdminAction extends Action
{
public ActionForward execute(ActionMapping mapping,ActionForm form,
HttpServletRequest request, HttpServletResponse response) throws Exception
{
return mapping.findForward("success");
}
}
Finally compile the classes and restart the web server and view the AdminForm.jsp
Struts Built-In ActionsThese built-in utility actions provide different functionalities useful to diverse applications. These Action classes are defined in org.apche.struts.actoins package.
ForwardActionThe ForwardAction (org.apache.struts.actions.ForwardAction) is one of the Builtin Actions that is shipped with struts framework. The org.apache.struts.actions.ForwardAction class enables a user to forward request to the specified URL. ForwardAction is an utility classs that is used in cases where a user simply needs to forward the control to an another JSP page. Linking directly a JSP to an another, violates the MVC principles. So we achieve this through action-mapping. Note that we do not create any action class. With ForwardAction , simply create an action mapping in the Strut Configuration and specify the location where the action will forward the request. Here in this example you will learn more about Struts Forward Action that will help you in grasping the concept better. No need to develop an Action ClassDeveloping the Action Mapping in the struts-config.xml Create seperate action-mapping , for each page you want to link.. Note that the "type" attribute always take "org.apache.struts.actions.ForwardAction" value. Here "parameter" attribute specifies the URL to which the request is forwarded .<action path="/success" type="org.apache.struts.actions.ForwardAction" parameter="/pages/Success.jsp" input="/pages/ForwardAction.jsp" scope="request" validate="false"> </action>Developing a jsp page Code of the jsp (ForwardAction.jsp) to forward request to a different jsp page : <%@ taglib uri="/WEB-INF/struts-bean.tld" prefix="bean"%> <%@ taglib uri="/WEB-INF/struts-html.tld" prefix="html"%> <html:html> <HEAD> <TITLE>Forward Action Example</TITLE> <BODY> <H3>Forward Action Example</H3> <p><html:link page="/success.do">Call the Success page</html:link></p> </html:html>Add the following line in the index.jsp to call the form. <li> <html:link page="/pages/ForwardAction.jsp">Struts Forward Action</html:link> <br> Example shows you how to use forward class to forward request to another JSP page. </li> Building and Testing the ExampleTo build and deploy the application go to Struts\Strutstutorial directory and type ant on the command prompt. This will deploy the application. Open the browser and navigate to the ForwardAction.jsp page. Your browser will display the following ForwardAction page.  Selecting Call the Success page displays the following Success.jsp page 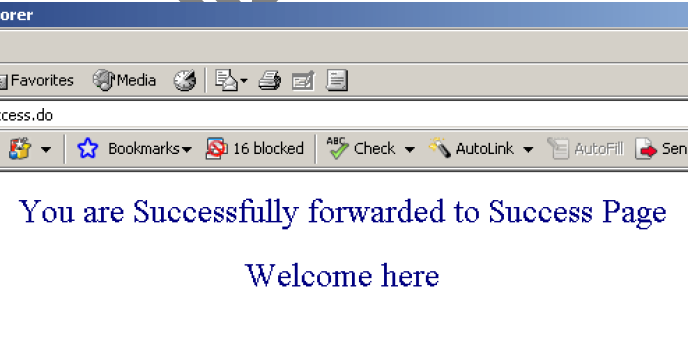 DispatchActionStruts Dispatch Action (org.apache.struts.actions.DispatchAction) is one of the Built-in Actions provided along with the struts framework. The org.apache.struts.actions.DispatchAction class enables a user to collect related functions into a single Action. It eliminates the need of creating multiple independent actions for each function. Here in this example you will learn more about Struts Dispatch Action that will help you grasping the concept better. Let's develop Dispatch_Action class which is a sub class of org.apache.struts. actions.DispatchAction class. This class does not provide an implementation for the execute() method because DispatchAction class itself implements this method. This class manages to delegate the request to one of the methods of the derived Action class. An Action Mapping is done to select the particular method (via Struts-onfiguration file). Here the Dispatch_Action class contains multiple methods ie.. add() , edit() , search() , save(). Here all the methods are taking the same input parameters but each method returns a different ActionForward like "add" in case of add() method , "edit" in case of edit() etc.Each ActionForward is defined in the struts-config.xml file (action mapping is shown later in this page). Here is the code for Action Class.Developing an Action Class (Dispatch_Action.java)
package com.soft.dispatch;
import java.io.*;
import javax.servlet.http.HttpServletRequest;
import javax.servlet.http.HttpServletResponse;
import javax.servlet.ServletException;
import org.apache.struts.actions.DispatchAction;
import org.apache.struts.action.ActionForm;
import org.apache.struts.action.ActionForward;
import org.apache.struts.action.ActionMapping;
public class Dispatch_Action extends DispatchAction
{
public ActionForward add(ActionMapping mapping, ActionForm form,
HttpServletRequest request,HttpServletResponse response) throws Exception{
System.out.println("You are in add function.");
return mapping.findForward("add");
}
public ActionForward edit(ActionMapping mapping, ActionForm form,
HttpServletRequest request,HttpServletResponse response) throws Exception {
System.out.println("You are in edit function.");
return mapping.findForward("edit");
}
public ActionForward search(ActionMapping mapping, ActionForm form,
HttpServletRequest request, HttpServletResponse response) throws Exception{
System.out.println("You are in search function");
return mapping.findForward("search");
}
public ActionForward save(ActionMapping mapping, ActionForm form,
HttpServletRequest request, HttpServletResponse response) throws Exception{
System.out.println("You are in save function");

return mapping.findForward("save");
}
}
Developing an ActionForm Class
Our form bean class contains only one property "parameter" which is playing prime role in this example. Based on the parameter value appropriate function of Action class is executed. Here is the code for FormBean ( DispatchActionForm.java):
package com.soft.dispatch;
import org.apache.struts.action.ActionForm;
public class DispatchActionForm extends ActionForm
{
private String parameter =" ";
public String getParameter()
{
return parameter;
}
public void setParameter(String parameter)
{
this.parameter=parameter;
}
}
Defining form Bean in struts-config.xml file <form-bean name="DispatchActionForm" type="com.soft.dispatch.DispatchActionForm"/>Developing the Action Mapping in the struts-config.xml Here, Action mapping helps to select the method from the Action class for specific requests. Note that the value specified with the parameter attribute is used to delegate request to the required method of the Dispath_Action Class. <action path="/DispatchAction" type=" com.soft.dispatch.Dispatch_Action" parameter="parameter" input="/pages/DispatchAction.jsp" name="DispatchActionForm" scope="request" validate="false"> <forward name="add" path="/pages/DispatchActionAdd.jsp" /> <forward name="edit" path="/pages/DispatchActionEdit.jsp" /> <forward name="search" path="/pages/DispatchActionSearch.jsp"/> <forward name="save" path="/pages/DispatchActionSave.jsp" /> </action>Developing jsp page Code of the jsp (DispatchAction.jsp) to delegate requests to different jsp pages : <%@ taglib uri="/WEB-INF/struts-bean.tld" prefix="bean"%> <%@ taglib uri="/WEB-INF/struts-html.tld" prefix="html"%> <html:html> <HEAD> <TITLE>Dispatch Action Example</TITLE> <BODY> <H3>Dispatch Action Example</H3> <p><html:link page="/DispatchAction.do?parameter=add">Call Add Section </html:link> </p> <p><html:link page="/DispatchAction.do?parameter=edit">Call Edit Section </html:link> </p> <p><html:link page="/DispatchAction.do?parameter=search">Call Search Section </html:link> </p> <p><html:link page="/DispatchAction.do?parameter=save">Call Save Section </html:link> </p> </html:html>Add the following line in the index.jsp to call the form. <li><html:link page="/pages/DispatchAction.jsp">Struts File Upload</html:link> <br> Example demonstrates how DispatchAction Class works. </li> Building and Testing the ExampleTo build and deploy the application go to Struts\Strutstutorial directory and type ant on the command prompt. This will deploy the application. Open the browser and navigate to the DispatchAction.jsp page. Your browser displays the following DispatchAction page. 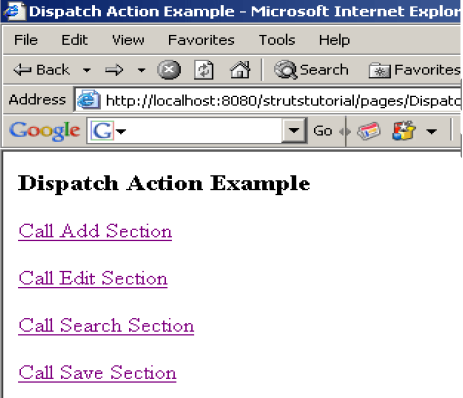 Selecting Call Add Section displays the following DispatchActionAdd.jsp page 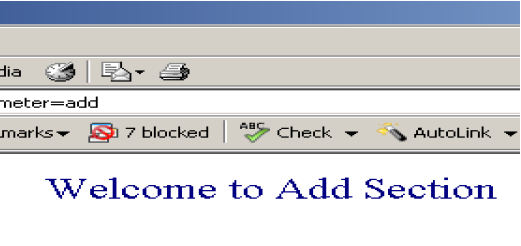 LookupDispatchActionStruts LookupDispatch Action (org.apache.struts.actions.LookupDispatchAction) is one of the Built-in Actions provided along with the struts framework.The org.apache. struts.actions.LookupDispatchAction class is a subclass of org.apache. struts. actions.DispatchAction class. This class enables a user to collect related functions into a single action class. It eliminates the need of creating multiple independent actions for each function. Here in this example you will learn more about Struts LookupDispatch Action that will help you to grasp the concept better. Let's develop a class LookupDispatch_Action which is a sub class of org.apache. struts.actions.LookupDispatchAction class. This class does not provide an implementation for the execute() method because DispatchAction class itself implements this method. LookupDispatchAction class is much like the Dispatch Action class except that it uses a Java Map and ApplicationResource. properties file to dispatch methods. At run time, this class manages to delegate the request to one of the methods of the derived Action class. Selection of a method depends on the value of the parameter passed from the incoming request. LookupDispatchAction uses this parameter value to reverse-map to a property in the Struts Resource bundle file (ie..ApplicationResource.properties). This eliminates the need of creating an instance of ActionForm class. LookupDispatch_Action class contains multiple methods ie.. add() , edit() , search() , save() . Here all the methods are taking the same input parameters but each method returns a different ActionForward like "add" in case of add() method , "edit" in case of edit() etc. Each ActionForward is defined in the struts-config.xml file (action mapping is shown later in this page). Notice the implementation of the getKeyMethodMap() method.This method is required to map the names of the keys in the Struts Resource bundle file (ie..ApplicationResource.properties) to the methods in the class. The key values in the bundle file are matched against the value of the incoming request parameter ( which is specified in the action tag through struts-config.xml file). Then this matching key is mapped to the appropriate method to execute ,the mecahanism is implemented through the getKeyMethodMap()and can be defined as key-to-method mapping. Here is the code for Action Class
package com.soft.lookupdispatch;
import java.io.*;
import java.util.*;
import javax.servlet.http.*;
import javax.servlet.ServletException;
import org.apache.struts.actions.LookupDispatchAction;
import org.apache.struts.action.ActionForm;
import org.apache.struts.action.ActionForward;
import org.apache.struts.action.ActionMapping;
public class LookupDispatch_Action extends LookupDispatchAction
{
protected Map getKeyMethodMap()
{
Map map = new HashMap();
map.put("form.add","add");
map.put("form.edit","edit");
map.put("form.search","search");
map.put("form.save","save");
return map;
}
public ActionForward add(ActionMapping mapping, ActionForm form,
HttpServletRequest request, HttpServletResponse response) throws Exception{
System.out.println("You are in add function.");
return mapping.findForward("add");
}
public ActionForward edit(ActionMapping mapping, ActionForm form,
HttpServletRequest request, HttpServletResponse response) throws Exception{
System.out.println("You are in edit function.");
return mapping.findForward("edit");
}
public ActionForward search(ActionMapping mapping, ActionForm form,
HttpServletRequest request, HttpServletResponse response) throws Exception{
System.out.println("You are in search function");
return mapping.findForward("search");
}
public ActionForward save(ActionMapping mapping, ActionForm form,
HttpServletRequest request, HttpServletResponse response) throws Exception{
System.out.println("You are in save function");
return mapping.findForward("save");
}
}
No need to Develop an ActionForm Class
Instead create an Application Resource Property File: Application.properties we can save this properties fiel in the classes folder. form.add=add form.edit=edit form.search=search form.save=saveAdd the following, Message Resources Definitions in struts-config.xml <message-resources parameter="ApplicationResources" />Develop the following Action Mapping in the struts-config.xml Here, Action mapping helps to select the method from the Action class for specific requests. Note that the value specified with the parameter Pattribute is used to delegate request to the required method of the LookupDispatch_Action Class. <action path="/LookupDispatchAction" type=" com.soft.lookupdispatch .LookupDispatch_Action" parameter="parameter" input="/pages/LookupDispatchAction.jsp" name="LookupDispatchActionForm" scope="request" validate="false"> <forward name="add" path="/pages/LookupDispatchActionAdd.jsp" /> <forward name="edit" path="/pages/LookupDispatchActionEdit.jsp" /> <forward name="search" path="/pages/LookupDispatchActionSearch.jsp"/> <forward name="save" path="/pages/LookupDispatchActionSave.jsp" /> </action>Developing jsp page Code of the jsp (LookupDispatchAction.jsp) to delegate requests to different jsp pages : <%@ taglib uri="/WEB-INF/struts-bean.tld" prefix="bean"%> <%@ taglib uri="/WEB-INF/struts-html.tld" prefix="html"%> <html:html> <p><html:link page="/LookupDispatchAction.do?parameter=add">Call Add Section </html:link></p> <p><html:link page="/LookupDispatchAction.do?parameter=edit">Call Edit Section </html:link></p> <p><html:link page="/LookupDispatchAction.do?parameter=search">Call Search Section </html:link></p> <p><html:link page="/LookupDispatchAction.do?parameter=save">Call Save Section </html:link></p> </html:html>Add the following line in the index.jsp to call the form. <li> <html:link page="/pages/LookupDispatchAction.jsp">Struts File Upload</html:link> <br> Example demonstrates how LookupDispatchAction class works. </li> Building and Testing the ExampleTo build and deploy the application go to Struts\Strutstutorial directory and type ant on the command prompt. This will deploy the application. Open the browser and navigate to the LookupDispatchAction.jsp page. Your browser displays the following LookupDispatchAction page. 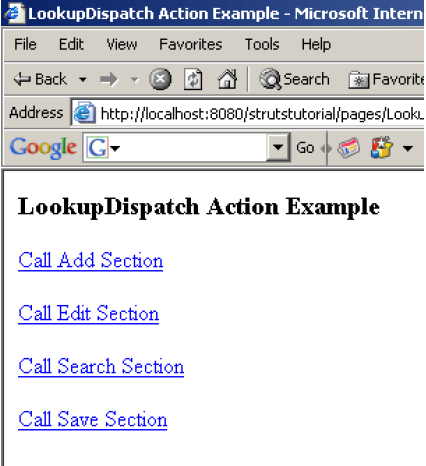 Selecting Call Add Section displays the following LookupDispatchActionAdd.jsp Page 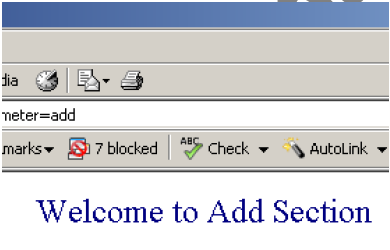 MappingDispatchActionStruts MappingDispatch Action (org.apache.struts.actions.MappingDispatchAction) is one of the Built-in Actions provided along with the struts framework. The org.apache.struts.actions.MappingDispatchAction class is a subclass of org.apache.struts.actions.DispatchAction class. This class enables a user to collect related functions into a single action class. It needs to create multiple independent actions for each function. Here in this example you will learn more about Struts MappingDispatchAction that will help you to grasp the concept better. Let's develop a class MappingDispatch_Action which is a sub class of org.apache.struts.actions. MappingDispatchAction class. This class does not provide an implementation for the execute() method because DispatchAction class itself implements this method. MappingDispatchAction class is much like the DispatchAction class except that it uses a unique action corresponding to a new request,to dispatch the methods At run time, this class manages to delegate the request to one of the methods of the derived Action class. Selection of a method depends on the value of the parameter passed from the incoming request. MappingDispatchAction uses this request parameter value and selects a corresponding action from the different action-mappings defined. This eliminates the need of creating an instance of ActionForm class. MappingDispatch_Action class contains multiple methods ie.. add() , edit() , search() , save() . Here all the methods are taking the same input parameters but each method returns a different ActionForward like "add" in case of add() method , "edit" in case of edit() etc. Each ActionForward is defined in the struts-config.xml file (action mapping is shown laterin this page). Developing an Action Class (MappingDispatch_Action.java)
package com.soft.mappingdispatch;
import java.io.*;
import java.util.*;
import javax.servlet.http.HttpServletRequest;
import javax.servlet.http.HttpServletResponse;
import javax.servlet.ServletException;
import org.apache.struts.actions.MappingDispatchAction;
import org.apache.struts.action.ActionForm;
import org.apache.struts.action.ActionForward;
import org.apache.struts.action.ActionMapping;
public class MappingDispatch_Action extends MappingDispatchAction
{
public ActionForward add(ActionMapping mapping, ActionForm form,
HttpServletRequest request, HttpServletResponse response) throws Exception{
System.out.println("You are in add function.");
return mapping.findForward("add"); }
public ActionForward edit(ActionMapping mapping, ActionForm form,
HttpServletRequest request, HttpServletResponse response) throws Exception{
System.out.println("You are in edit function.");
return mapping.findForward("edit"); }
public ActionForward search(ActionMapping mapping, ActionForm form,
HttpServletRequest request, HttpServletResponse response) throws Exception{
System.out.println("You are in search function");
return mapping.findForward("search"); }
public ActionForward save(ActionMapping mapping, ActionForm form,
HttpServletRequest request, HttpServletResponse response) throws Exception{
System.out.println("You are in save function");
return mapping.findForward("save");
}
}
No need to Develop an ActionForm Class Developing the Action Mapping in the struts-config.xml Here, we need to create multiple independent actions for each method defined in the action class. Note that the value specified with the parameter attribute is used to delegate request to the required method of the MappingDispatch_Action Class. <action path="/MappingDispatchAction" type=" com.soft.mappingdispatch.MappingDispatch_Action" parameter="add" input="/pages/MappingDispatchAction.jsp" scope="request" validate="false"> <forward name="add" path="/pages/MappingDispatchActionAdd.jsp" /> </action> <action path="/MappingDispatchAction" type=" com.soft.mappingdispatch.MappingDispatch_Action" parameter="edit" input="/pages/MappingDispatchAction.jsp" scope="request" validate="false"> <forward name="edit" path="/pages/MappingDispatchActionEdit.jsp" /> </action> <action path="/MappingDispatchAction" type=" com.soft.mappingdispatch.MappingDispatch_Action" parameter="search" input="/pages/MappingDispatchAction.jsp" scope="request" validate="false"> <forward name="search" path="/pages/MappingDispatchActionSearch.jsp"/> </action> <action path="/MappingDispatchAction" type=" com.soft.mappingdispatch.MappingDispatch_Action" parameter="save" input="/pages/MappingDispatchAction.jsp" scope="request" validate="false"> <forward name="save" path="/pages/MappingDispatchActionSave.jsp" /> </action>Developing jsp page Code of the jsp (MappingDispatchAction.jsp) to delegate requests to different jsp pages <%@ taglib uri="/WEB-INF/struts-bean.tld" prefix="bean"%> <%@ taglib uri="/WEB-INF/struts-html.tld" prefix="html"%> <html:html> <H3>Dispatch Action Example</H3> <p><html:link page="/MappingDispatchAction.do?parameter=add">Call Add Section </html:link></p> <p><html:link page="/MappingDispatchAction.do?parameter=edit">Call Edit Section </html:link></p> <p><html:link page="/MappingDispatchAction.do?parameter=search">Call Search Section </html:link></p> <p><html:link page="/MappingDispatchAction.do?parameter=save">Call Save Section </html:link></p> </html:html>Add the following line in the index.jsp to call the form. <li> <html:link page="/pages/MappingDispatchAction.jsp">Struts File Upload</html:link> <br> Example demonstrates how MappingDispatchAction class works. </li> Building and Testing the ExampleTo build and deploy the application go to Struts\Strutstutorial directory and type ant on the command prompt. This will deploy the application. Open the browser and navigate to the MappingDispatchAction.jsp page. Your browser displays the following MappingDispatchAction page. 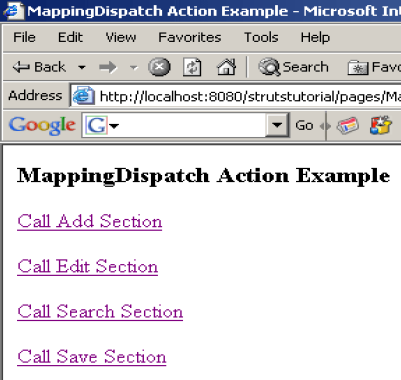 Selecting Call Add Section displays the following MappingDispatchActionAdd.jsp page 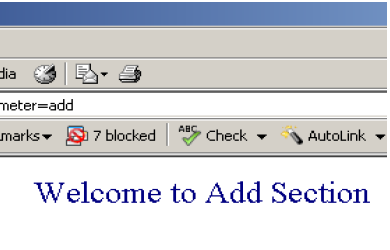 FileUploadThe interface org.apache.struts.upload.FormFile is the heart of the struts file upload application This interface represents a file that has been uploaded by a client. It is the only interface or class in upload package which is typically referenced directly by a Struts application. Creating Form Bean Our form bean class contains only one property theFile, which is of type org.apache.struts.upload.FormFile. Here is the code of FormBean (UploadForm.java)
package com.soft.upload
import org.apache.struts.upload.FormFile;
import org.apache.struts.action.ActionForm;
public class UploadForm extends ActionForm
{
private FormFile file1;
private FormFile file2;
public FormFile getFile1()
{
return file1;
}
public void setFile1(FormFile file1)
{
this.file1 = file1;
}
public FormFile getFile2()
{
return file2;
}
public void setFile2(FormFile file2)
{
this.file2 = file2;
}
}
Creating Action Class
Our action class simply calls the getTheFile() function on the FormBean object to
retrieve the reference of the uploaded file. Then the reference of the FormFile is used to
get the uploaded file and its information. Here is the code of UploadAction class.
package com.soft.upload;
import java.io.*;
import javax.servlet.http.*;
import org.apache.struts.action.*;
import org.apache.struts.upload.FormFile;
public class UploadAction extends Action {
public ActionForward execute(ActionMapping mapping, ActionForm form,
HttpServletRequest request, HttpServletResponse response) throws Exception
{
UploadForm uform = (UploadForm) form;
FormFile f1 =uform.getFile1();
FormFile f2 =uform.getFile2();
InputStream s1=f1.getInputStream();
InputStream s2=f2.getInputStream();
String fname1=f1.getFileName();
String fname2=f2.getFileName();
request.setAttribute("fName1", fname1);
request.setAttribute("fName2", fname2);
return mapping.findForward("result");
}
}
Defining form Bean in struts-config.xml file
Add the following entry in the struts-config.xml file for defining the form bean:
<form-bean
name="FileUpload"
type=" com.soft.upload.UploadForm"/>
Defining Action Mapping
Add the following action mapping entry in the struts-config.xml file:
<action-mappings>
<action path="/upload"
type="com.soft.upload.UploadAction"
name=" FileUpload ">
<forward name="result" path="/result.jsp" />
</action>
</action-mappings>
Developing jsp page Code of the jsp (FileUpload.jsp) file to upload is as follows: <%@ taglib uri="XYZ" prefix="html" %> <html:form action="upload.do" enctype="multipart/form-data"> <center><h1>Please Select The File</h1></center> Enter File1 <html:file property="file1" /><br /><br /> Enter File2 <html:file property="file2" /><br /><br /> <html:submit /> </html:form>Note that we are setting the encrypt property of the form to enctype="multipart/form-data". code for the result page (Result.jsp) is:
<b>The File Name1</b>: <%= request.getAttribute("fName1") %> <br />
<b>The File Name2</b>: <%= request.getAttribute("fName2") %> <br />
Struts Plug-InStruts PlugIn allows the programmer to enhance their web applications. There are many PlugIns available for struts e.g. Struts Tiles PlugIn, Struts Hibernate PlugIn, Struts Spring PlugIn etc. Beside these available PlugIn you can create your own PlugIn. Understanding PlugIn. Struts PlugIns are configured using the <plug-in> element within the Struts configuration file. This element has only one valid attribute, 'className', which is the fully qualified name of the Java class which implements the org.apache.struts.action. PlugIn interface. For PlugIns that require configuration themselves, the nested <setproperty> element is available. The plug-in tag in the struts-config.xml file is used to declare the PlugIn to be loaded at the time of server start-up. Following example shows how to declare the Tiles PlugIn: <plug-in className="org.apache.struts.tiles.TilesPlugin"> <set-property property="definitions-config" value="/WEB-INF/tiles-defs.xml"/> </plug-in> The above declaration instructs the struts to load and initialize the Tiles plugin for your application on startup. Writing Struts PlugIn Java CodeIn this example we write HelloWorld Struts PlugIn example that will give you idea about creating, configuring and checking Struts PlugIn. Our HelloWorld Stuts PlugIn contains a method called Say Hello, which simply returns HelloWorld message. Here is code of HelloWorld Struts Plugin:
package com.soft.plugin;
import javax.servlet.ServletContext;
import javax.servlet.ServletException;
import org.apache.struts.action.PlugIn;
import org.apache.struts.action.ActionServlet;
import org.apache.struts.config.ModuleConfig;
public class HelloWorldStrutsPlugin implements PlugIn {
public static final String PLUGIN_NAME_KEY
= HelloWorldStrutsPlugin.class.getName();
public void destroy() {
System.out.println("Destroying Hello World PlugIn");
}
public void init(ActionServlet servlet, ModuleConfig config)
throws ServletException {
System.out.println("Initializing Hello World PlugIn");
ServletContext context = null;
context = servlet.getServletContext();
HelloWorldStrutsPlugin objPlugin = new HelloWorldStrutsPlugin();
context.setAttribute(PLUGIN_NAME_KEY, objPlugin);
}
public String sayHello(){
System.out.println("Hello Plugin");
return "Hello Plugin";
}
Configuring PlugIn
To configure the plugin add the following line your struts-config.xml file.
<plug-in className="com.soft.plugin.HelloWorldStrutsPlugin">
</plug-in>
Calling PlugIn From JSP Page Here is the code for calling our PlugIn from jsp page. <%@page contentType="text/html" import="java.util.*,com.soft.plugin.*" %> <% ServletContext servletContext = this.getServletContext(); HelloWorldStrutsPlugin plugin= (HelloWorldStrutsPlugin) servletContext.getAttribute (HelloWorldStrutsPlugin.PLUGIN_NAME_KEY); String strMessage = plugin.sayHello(); %> Message From Plugin: <%=strMessage%> Building and TestingUse ant tool to build the application and then deploy on the server. Enter the url http://localhost:8080/strutstutorial/pages/plugin.jsp in your browser. It display "Hello Plugin" message. Your server console also should display "Hello Plugin" message. STRUTS INTERNATIONALIZATIONThe Multinational Corporations have their branches in various parts of the world. so, they must provide products and services to their clients and customers in their traditional way. The customers will expect the product to work in their native languages especially the date, time, currency etc.,. So, the we should not make any assumptions about their clients region or language. If such assumptions become invalid, we have to re-engineer the applications. Internationalization or I18N is the process of designing the software to support multiple languages and regions, so that we don't need to re-engineer the applications every language or country needs to be supported. Struts provides various locale sensitive JSP tags which can be used to make the applications simpler. With this short introduction we shall see how to implement i18n in a Simple JSP file of Struts. <%@ page language="java" %> <%@ taglib uri="/WEB-INF/struts-html.tld" prefix="html" %> <%@ taglib uri="/WEB-INF/struts-bean.tld" prefix="bean" %> <%@ taglib uri="/WEB-INF/struts-logic.tld" prefix="logic" %> <html:html locale="true"> <body bgcolor=pink> <bean:message key="index.info" /> </body> </html:html> Next copy struts-blank.war to f:\tomcat\webapps and start the tomcat with JAVA_HOME as jdk1.4. A folder named struts-blank will be created. Rename the folder as localedemo. Copy the above JSP file to f:\tomcat\webapps\localedemo. Now we have to edit the property files for various locales. The struts framework (struts1.1) provides a property file named application.properties. It is present in the folder f:\tomcat\webapps\localedemo\web-inf\classes\resources. We have to add our own property file in this folder only. Our property file much be named along with the language code For example the language code of
So, when we write i18n message in German language it must be placed in property file named application_de.properties and all the properties files must be present in the resources folder only. Also when we write the property file of a particular language it need not be of the same language. For example we can create application_de.properties and write the message in french or english. In fact, the message does not depend on any language. It is a simple key value pair. The message we give for the key is just substituted. The property file to locate the value of key depends on the language settings of the browser. For this example, we will write four properties file as follows.
f:\tomcat\webapps\localedemo\web-inf\classes\resources\application_es.properties
f:\tomcat\webapps\localedemo\web-inf\classes\resources\application_en.properties
f:\tomcat\webapps\localedemo\web-inf\classes\resources\application_fr.properties
Also append this text in the application.properties file Now we have to add entry in the struts-config.xml file for all the properties files. The entry and its corresponding portion is shown below. <!-- Message Resources Definitions --> <message-resources parameter="resources.application_fr"/> <message-resources parameter="resources.application_es"/> <message-resources parameter="resources.application_en"/> <message-resources parameter="resources.application_de"/> <message-resources parameter="resources.application"/> Now restart the Tomcat server. Open the Internet Explorer and type the URL as http://localhost:8080/localedemo/localedemo.jsp. We will get the message 'ENGLAND'. This is because our default browser language is 'United States English'. Now we have to change the language settings of the browser to change the locale. For that, Open a new Internet Explorer, goto 'Tools' menu and select the 'Internet Options'. In the 'Internet Option' dialog box, select 'General' tab and click the 'Languages...' button. We will get 'Language Preference' dialog box. There click 'Add...' button and add the languages. For this example add English, Spanish, German and French. Here we have languages specific to particular region. For example we have, French Belgium, French Canada, French France etc., we can select any one of these in all cases. Next select 'German' and by using the 'Move up' button, place it on the top. Now type the URL as http://localhost:8080/localedemo/localedemo.jsp. We will get the message 'GERMAN' similarly place 'Spanish' and 'French' at the top, we will get the message 'SPAIN' and 'FRANCE' respectively. ---------------------------------------------------------------------------Struts Tag LibrariesThe Struts framework provides a set of six built-in Tag libraries that allow you to build the view part of the MVC without embedding Java code directly within your application JSPs. The six Struts libraries are:
The Bean TagsThe Tags within the Bean Library are used for creating and accessing JavaBeans and a few other general purpose uses. Although these tags work with any standard JavaBean, they are often used with Objects that extend the Struts ActionForm class. Table 1 lists the tags within the Bean Library.Tags within the Struts Bean Tag Library
The HTML TagsStruts provides HTML tag library for easy creation of user interfaces. There are also a few other useful Tags used in the creation and rendering of HTML-based user interfaces. The Tags included within the HTML Library are shown in following table. To use the Struts HTML Tags we have to include the following line in our JSP file:<%@ taglib uri="/tags/struts-html" prefix="html" %>above code makes available the tag to the jsp. Tags within the Struts HTML Tag Library
Most all of the Tags within the HTML Tag library must be nested within the Struts Form Tag. The Logic TagsThe Logic Tag Library contains tags that are helpful with iterating through collections, conditional generation of output, and application flow. Table 3 lists the Tags within the Logic Library. Tags within the Struts Logic Tag Library
The Nested TagsThe Nested Tags were added to Struts during development of the 1.1 release. They extend the existing Tags functionality by allowing the Tags to relate to each other is a nested fashion. This is most useful when dealing with Object graphs. The Nested Tags don't add any additional functionality over the Struts standard Tags other than to support the nested approach. For each Tag in the Bean, HTML, and Logic libraries, there is an equivalent nested Tag. The Template TagsThe Template Tag Library was created to reduce the redundancy found in most web applications. In most web sites, there are sections within multiple pages that are exactly the same. The header, menus, or footers are three obvious examples. Instead of duplicating the content in each page and having to modify all pages when something like the look and feel changes, Templates allow you to have the common content in one place and insert it where necessary. However, since the Tiles framework was introduced, the Template Tags have been deprecated and developers are encouraged to use Tiles. Tiles Library TagsAs mentioned earlier, the Tiles framework is now integrated into the core Struts framework. Tiles is similar to the Template Tags except that it adds much more functionality and flexibility. For instance, Tiles supports inheritance between Tiles and allows you to define layouts and reuse those layouts within your site. They also support different Tiles and layouts based on I18N and channel. The Tags with the Tiles Library are shown in Table 4. Tags within the Struts Tiles Tag Library
Tiles FrameWorkWhat is Struts Tiles?Tiles is a framework for the development user interface. Tiles is enables the developers to develop the web applications by assembling the reusable tiles (jsp, html, etc..). Tiles uses the concept of reuse and enables the developers to define a template for the web site and then use this layout to populate the content of the web site. For example, if you have to develop a web site having more that 500 page of static content and many dynamically generated pages. The layout of the web site often changes according to the business requirement. In this case you can use the Tiles framework to design the template for the web site and use this template to populate the contents. In future if there is any requirement of site layout change then you have to change the layout in one page. This will change the layout of you whole web site. Steps To Create Tiles Application
Tiles is very useful framework for the development of web applications. Here are the steps necessary for adding Tiles to your Struts application:
Tiles can can be used with or without Struts. Following entry is required in the web.xml <taglib> <taglib-uri>/tags/struts-tiles</taglib-uri> <taglib-location>/WEB-INF/struts-tiles.tld</taglib-location> </taglib>Create layout JSPs. Our web application layout is divided into four parts: To Banner, Left Navigation Bar, Content Area and Bottom of the page for copy right information. Here is the code for out template (template.jsp): <%@ taglib uri="/WEB-INF/struts-tiles.tld" prefix="tiles" %> <html> <head> <title><tiles:getAsString name="title" ignore="true"/></title> </head> <body> <table border="1" cellpadding="0" cellspacing="0" width="100%" bordercolor="#000000" bgcolor="#E7FDFE"> <tr> <td width="100%" colspan="2" valign="top"><tiles:insert attribute="header"/></td> </tr> <tr> <td width="23%"><tiles:insert attribute="menu"/></td> <td width="77%" valign="top" valign="top"><tiles:insert attribute="body"/></td> </tr> <tr> <td width="100%" colspan="2" valign="top"><tiles:insert attribute="bottom"/></td> </tr> </table> </body> </html> We have defined the structure for web application using the appropriate html and did the following things:
Now we will use tile layout create a page to display the content page in the in our application. For every content page there is additional jsp file for inserting the content in the Layout, so we have to create two jsp files one for content and another for displaying the content. In our example these file are example.jsp and content.jsp. Here is the code for both the files: content.jsp<p align="left"><font color="#000080" size="5">Welcome to the Title Tutorial</font></p> <p align="left"><font color="#000080" size="5">This is the content page</font></p> The content.jsp simply define the content of the page. The content may be dynamic or static depending on the requirements. example.jsp<%@ page language="java" %> <%@ taglib uri="/WEB-INF/struts-tiles.tld" prefix="tiles" %> <tiles:insert page="/tiles/template.jsp" flush="true"> <tiles:put name="title" type="string" value="Welcome" /> <tiles:put name="header" value="/tiles/top.jsp" /> <tiles:put name="menu" value="/tiles/left.jsp" /> <tiles:put name="body" value="/tiles/content.jsp" /> <tiles:put name="bottom" value="/tiles/bottom.jsp" /> </tiles:insert> The code <tiles:insert page="/tiles/template.jsp" flush="true"> specifies the tiles layout page to be used. We have set the flush attribute to true, this makes the tile file to be written to browser before the rest of the page. To specify the title of the page <tiles:put name="title" type="string" value="Welcome" /> is used. The following code is used to insert the actual pages in the template.:<tiles:put name="header" value="/tiles/top.jsp" /> <tiles:put name="menu" value="/tiles/left.jsp" /> <tiles:put name="body" value="/tiles/content.jsp" /> <tiles:put name="bottom" value="/tiles/bottom.jsp" /> The top.jsp will be inserted in the layout's header region. The left.jsp will be inserted in the layout's menu region. The content.jsp wil be inserted in the layout's body region and the bottom.jsp will be inserted in the bottom region. Repackage, run and test applicationAdd the following code in the index.jsp to test the this tile example: <li> <html:link page="/tiles/example.jsp">Tiles Example</html:link> <br> Example of creating first tile application. </li> Use the ant tool to build the application and deploy on the server. To test the application go to the index.jps and click on the Tiles Example link. Using tiles-defs.xml in Tiles ApplicationIn Tiles we can define the definition in the tiles-defs.xml which specifies the different components to "plugin" to generate the output. This eliminates the need to define extra jsp file for each content file. For example in the last section we defined example.jsp to display the content of content.jsp file. In this section I will show you how to eliminate the need of extra jsp file using tiles-defs.xml file. Steps to Use the tiles-defs.xmlSetup the Tiles plugin in struts-config.xml file. Add the following code in the struts-config.xml (If not present). This enables the TilesPlugin to use the /WEB-INF/tiles-defs.xml file. <plug-in className="org.apache.struts.tiles.TilesPlugin" > <!-- Path to XML definition file --> <set-property property="definitions-config" value="/WEB-INF/tiles-defs.xml" /> <!-- Set Module-awareness to true --> <set-property property="moduleAware" value="true" /> </plug-in>Defining the tiles-defs.xml In this file we are defining the different components to "plugin". Here is the code: <definition name="Tiles.Example" page="/tiles/template.jsp"> <put name="title" type="string" value="Welcome" /> <put name="header" value="/tiles/top.jsp" /> <put name="menu" value="/tiles/left.jsp" /> <put name="body" value="/tiles/content.jsp" /> <put name="bottom" value="/tiles/bottom.jsp" /> </definition> The name of the definition is Tiles.Example, we will use this in struts-config.xml (While creating forwards in struts-config.xml file) file. The page attribute defines the template file to be used and the put tag specifies the different components to "plugin". Your tilesdefs. xml should look like:
<?xml version="1.0" encoding="ISO-8859-1" ?>
<!DOCTYPE tiles-definitions PUBLIC
"-//Apache Software Foundation//DTD Tiles Configuration 1.1//EN"
"http://jakarta.apache.org/struts/dtds/tiles-config_1_1.dtd">
<tiles-definitions>
<definition name="Tiles.Example" page="/tiles/template.jsp">
<put name="title" type="string" value="Welcome" />
<put name="header" value="/tiles/top.jsp" />
<put name="menu" value="/tiles/left.jsp" />
<put name="body" value="/tiles/content.jsp" />
<put name="bottom" value="/tiles/bottom.jsp" />
</definition>
<definition name="${YOUR_DEFINITION_HERE}">
</definition>
</tiles-definitions>
Configure the Struts Action to use Tiles DefinitionOpen the struts-config.xml file and add the following code: <action path="/Tiles/Example" forward="Tiles.Example"/> With Tiles, the action points to the Tiles definition, as shown in the above code. In this code we are using the Tiles.Example definition which we have defined in the tilesdefs. xml file. Without Tiles, forward and action definitions point directly to JSPs. With Tiles, they point to the page's definition in the Tiles configuration file. Testing the ApplicationCreate a link in index.jsp to call the Example. Code added are: <li> <html:link page="/Tiles/Example.do">Using tiles-defs.xml</html:link> <br> Example shows you how to use tiles-defs.xml file. </li>
To test the application build it using ant and deploy on the Tomcat server. Design PatternsWhat is the design pattern ?If a problem occurs over and over again, a solution to that problem has been used effectively. That solution is described as a pattern. The design patterns are language-independent strategies for solving common object-oriented design problems. When you make a design, you should know the namesj of some common solutions. Learning design patterns is good for people to communicate each other effectively. In fact, you may have been familiar with some design patterns, you may not use wellknown names to describe them. SUN suggests GOF (Gang of Four--four pioneer guys who wrote a book named "Design Patterns"- Elements of Reusable Object-Oriented Software), so we use that book as our guide to describe solutions. Please make you be familiar with these terms and learn how other people solve the code problems.Do I have to use the design pattern?If you want to be a professional Java developer, you should know at least some popular solutions to coding problems. Such solutions have been proved efficient and effective by the experienced developers. These solutions are described as so-called design patterns. Learning design patterns speeds up your experience accumulation in OOA/OOD. Once you grasped them, you would be benefit from them for all your life and jump up yourselves to be a master of designing and developing. Furthermore, you will be able to use these terms to communicate with your fellows or assessors more effectively. Many programmers with many years experience don't know design patterns, but as an Object-Oriented programmer, you have to know them well, especially for new Java programmers. Actually, when you solved a coding problem, you have used a design pattern. You may not use a popular name to describe it or may not choose an effective way to better intellectually control over what you built. Learning how the experienced developers to solve the coding problems and trying to use them in your project are a best way to earn your experience and certification. Remember that learning the design patterns will really change how you design your code; not only will you be smarter but will you sound a lot smarter, too. How many design patterns?Many. A site says at least 250 existing patterns are used in OO world, including Spaghetti which refers to poor coding habits. The 23 design patterns by GOF are well known, and more are to be discovered on the way.Note that the design patterns are not idioms or algorithms or components. What is the relationship among these patterns?Using a single component to process application requests. Generally, to build a system, you may need many patterns to fit together. Different designer may use different patterns to solve the same problem. Usually:
Singleton Design PatternThis is one of the most commonly used patterns. There are some instances in the application where we have to use just one instance of a particular class. Let's take up an example to understand this. The figure below illustrates the Singleton design pattern class diagram.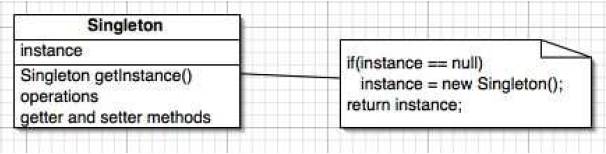 Singleton class diagram
As you can see from the figure above, there's not a whole lot to the Singleton design pattern. Singletons maintain a static reference to the sole singleton instance and return a reference to that instance from a static instance() method. The following example shows a classic Singleton design pattern implementation:
public class ClassicSingleton {
private static ClassicSingleton instance = null;
protected ClassicSingleton() {
// Exists only to defeat instantiation.
}
public static ClassicSingleton getInstance() {
if(instance == null) {
instance = new ClassicSingleton();
}
return instance;
}
}
The singleton implemented in above example is easy to understand. The ClassicSingleton class maintains a static reference to the lone singleton instance and returns that reference from the static getInstance() method. There are several interesting points concerning the ClassicSingleton class. First, ClassicSingleton employs a technique known as lazy instantiation to create the singleton; as a result, the singleton instance is not created until the getInstance() method is called for the first time. This technique ensures that singleton instances are created only when needed. Second, notice that ClassicSingleton implements a protected constructor so clients cannot instantiate ClassicSingleton instances; however, you may be surprised to discover that the following code is perfectly legal:
public class SingletonInstantiator
{
public SingletonInstantiator() {
ClassicSingleton instance = ClassicSingleton.getInstance();
ClassicSingleton anotherInstance = new ClassicSingleton();
...
}
}
How can the class in the preceding code fragment-which does not extend ClassicSingleton-create a ClassicSingleton instance if the ClassicSingleton constructor is protected ? The answer is that protected constructors can be called by subclasses and by other classes in the same package. Because ClassicSingleton and SingletonInstantiator are in the same package (the default package), SingletonInstantiator() methods can create ClassicSingleton instances. This dilemma has two solutions: You can make the ClassicSingleton constructor private so that only ClassicSingleton() methods call it; however, that means ClassicSingleton cannot be subclassed. Sometimes, that is a desirable solution; if so, it's a good idea to declare your singleton class final, which makes that intention explicit and allows the compiler to apply performance optimizations. The other solution is to put your singleton class in an explicit package, so classes in other packages (including the default package) cannot instantiate singleton instances. Front Controller Design patternBrief DescriptionMany interactive Web applications are composed of brittle collections of interdependent Web pages. Such applications can be hard to maintain and extend. The Front Controller pattern defines a single component that is responsible for processing application requests. A front controller centralizes functions such as view selection, security, and templating, and applies them consistently across all pages or views. Consequently, when the behavior of these functions need to change, only a small part of the application needs to be changed: the controller and its helper classes. Detailed ExampleCentralizing request processing and view selection. A Servlet is utilized as the main point of entry for web requests. The class MainServlet is the front controller for the Java Pet Store sample application website. All requests that end with *.do are mapped to go through the MainServlet for processing. The following code excerpts form the core of the controller. A sequence diagram outlining the actions taken by the MainServlet in response to the user request appears in Figure 1 below.  Figure 1. Sequence diagram of MainServlet in action The MainServlet source code is straightforward:The methods that process HTTP POST and GET (transition number 1 in Figure 1) both use method doProcess, shown in this example. The method receives the request and response, and passes the request to the RequestProcessor, which dispatches the request to the business logic (represented by the "Model" in Figure 1 above) that handles it. The request processor executes an application function that corresponds to the request URL ("2: dispatch" in Figure 1). The map from request URLs to application functions is defined in an XML file, mappings.xml.
private void doProcess(HttpServletRequest request,
HttpServletResponse response)
throws IOException, ServletException {
...
try {
getRequestProcessor().processRequest(request);
After dispatching the request to the business logic, the controller then passes the request to the ScreenFlowManager, which chooses the next screen to display, again based on the contents of mappings.xml ("3: select view" in Figure 1). Exceptions can also be mapped to screens in mappings.xml: if business logic throws an exception, the exception is stored in the request, and the next screen is chosen based on the exception type. If no next screen is defined, a default screen is used.
getScreenFlowManager().forwardToNextScreen(request, response);
} catch (Throwable ex) {
String className = ex.getClass().getName();
nextScreen = getScreenFlowManager().getExceptionScreen(ex);
// put the exception in the request

request.setAttribute("javax.servlet.jsp.jspException", ex);
if (nextScreen == null) {
// send to general error screen
ex.printStackTrace();
throw new ServletException("MainServlet: unknown exception: " +
className);
}
}
Finally, the front controller forwards the request to the next screen ("4: present view" in Figure 1). The component (usually the templating service) at the URL for the next screen receives the screen name and any server-side state defined by the previous operations. This functionality is delegated to the ScreenFlowManager, which forwards to the next screen. DATA TRANSFOR OBJECTThe client tier in an EJB system needs a way to transfer bulk data with the server, as the J2EE aplications implement server side business component.Some methods exposed by the business components return data to the client. Often, the client invokes a business object's get methods multiple times until it obtains all the attribute values. If the client needs to display or update a set of attributes that live on the server, these attributes could live in an entity bean or be accessible through a session bean. The client could get or update the data is by loading many parameters into a method call, when updating data on the server, or by making multiple fine-grained calls to the server to retrieve data. Every call between the client and server is a remote method call with substantial network overhead. If the client application calls the individual getter and setter methods that require or update single attribute values, it will require as many remote calls as there are attributes. The individual calls generate a lot of network traffic and affects severely the system performance. The solution to this problem is to use a plain java classes called Value Objects or Transfer Objects which encapsulate the bulk business data. A single method call is used to send and retrieve the Transfer Object / Value Obects. When the client requests the enterprise bean for the business data, the enterprise bean can construct the Transfer Object, populate it with its attribute values, and pass it by value to the client. When an enterprise bean uses a Transfer Object / Value Obects, the client makes a single remote method invocation to the enterprise bean to request the Transfer Object / Value Obects instead of numerous remote method calls to get individual attribute values. The enterprise bean then constructs a new Transfer Object instance, copies values into the object and returns it to the client. The client receives the Transfer Object / Value Obects and can then invoke accessor or getter methods on the Transfer Object to get the individual attribute values from the Transfer Object. The implementation of the Transfer Object / Value Obectsmay be such that it makes all attributes public. Because the Transfer Object / Value Obects is passed by value to the client, all calls to the Transfer Object / Value Obects instance are local calls instead of remote method invocations. A Transfer object / value object is a plain serializable Java class that represents a snapshot of some server side data, as in the following code example:
import java.io.Serializable;
public class OneValueObject implements Serializable {
private int attribute1;
private String attribute2;
private String attribute3;
private long attribute4;
...
public int getAttribute1();
public String getAttribute2();
public String getAttribute3();
public long getAttribute4();
...
}
The responsibilities of the three components participating in this patterns are :
ClientThis represents the client of the enterprise bean. The client can be an end-user application, like jsp, servlets or a java applet, as in the case of a rich client application that has been designed to directly access the enterprise beans. The client can be Business Delegates or a different BusinessObject.Business ObjectThe Business Object represents a role in this pattern that can be fulfilled by a session bean, an entity bean, or a Data Access Object (DAO). The BusinessObject is responsible for creating the Transfer Object and returning it to the client upon request. The Business Object may also receive data from the client in the form of a Transfer Object / Value Obects and use that data to perform an update.Transfer Object / Value ObjectsThe Transfer Object / Value Obects is an arbitrary serializable Java object referred to as a Transfer Object / Value Obects. Transfer Object / Value Obects has all the business values required by the client. A Transfer Object / Value Obects class may provide a constructor that accepts all the required attributes to create the Transfer Object / Value Obects. The constructor may accept all entity bean attribute values that the Transfer Object / Value Obects is designed to hold. Typically, the members in the Transfer Object / Value Obects are defined as public, thus eliminating the need for get and set methods. If some protection is necessary, then the members could be defined as protected or private, and methods are provided to get the values. Transfer Objects / Value Obects can be mutable or immutabel depending on whether the application wants to allow updates to the Transfer Objects / Value ObectsSTRUTS 2Struts and webwork has joined together to develop the Struts 2 Framework. Struts 2 Framework is very extensible and elegant for the development of enterprise web application of any size. In this section we are going to explain you the architecture of Struts 2 Framework. The strut-2 framework is designed for the compilation of the entire development cycle including of building, developing and maintaining the whole application. It is very extensible as each class of the framework is based on an Interface and all the base classes are given an extra application and even you can add your own. The basic platform requirements are Servlet API 2.4, JSP API 2.0 and Java 5.We are assuming here that you have some knowledge about the technologies used. Features:Some of the general features of the current Apache Strut 2 framework are given below.Architecture - First the web browser request a resource for which the Filter Dispatcher decides the suitable action. Then the Interceptors use the required functions and after that the Action method executes all the functions like storing and retrieving data from a database. Then the result can be seen on the output of the browser in HTML, PDF, images or any other. Tags - Tags in Strut 2 allow creating dynamic web applications with less number of coding. Not only these tags contain output data but also provide style sheet driven markup that in turn helps in creating pages with less code. Here the tags also support validation and localization of coding that in turn offer more utilization. The less number of codes also makes it easy to read and maintain. MVC - The Model View Controller in Strut 2 framework acts as a coordinator between application's model and web view. Its Controller and View components can come together with other technology to develop the model. The framework has its library and markup tags to present the data dynamically. Configuration - Provides a deployment descriptor to initialize resources in XML format. The initialization takes place simply by scanning all the classes using Java packages or you can use an application configuration file to control the entire configuration. Its general-purpose defaults allow using struts directly Out of the box. Configuration files are re-loadable that allows changes without restarting a web container. Other Features:
Differences between Struts1 and Struts 2:Struts2 is more powerful framework as compared to struts1. The table given below describes some differences between struts1 and struts2
History:Apache Struts is an open-source framework that is used for developing Java web application. Originally developed by the programmer and author Craig R. McClanahan, this was later taken over by the Apache Software Foundation in 2002. Struts have provided an excellent framework for developing application easily by organizing JSP and Servlet based on HTML formats and Java code. Strut1 with all standard Java technologies and packages of Jakarta assists to create an extensible development environment. However, with the growing demand of web application, Strut 1 does not stand firm and needs to be changed with demand. This leads to the creation of Strut2, which is more developer friendly with features like Ajax, rapid development and extensibility. Struts is a well-organized framework based on MVC architecture. In Model- View-Controller Architecture, Model stands for the business or database code, View represents the page design code and the Controller for navigational code. All these together makes Struts an essential framework for building Java applications. But with the development of new and lightweight MVC based framworks like Spring, Stripes and Tapestry, it becomes necessary to modify the Struts framework. So, the team of Apache Struts and another J2EE framework, WebWork of OpenSymphony joined hand together to develop an advanced framework with all possible developing features that will make it developer and user friendly. Strut2 contains the combined features of Struts Ti and WebWork 2 projects that advocates higher level application by using the architecture of WebWork2 with features including a plugin framework, a new API, Ajax tags etc. So the Struts communities and the WebWork team brought together several special features in WebWork2 to make it more advance in the Open Source world. Later the name of WebWork2 has changed to Struts2. Hence, Apache Strut 2 is a dynamic, extensible framework for a complete application development from building, deploying and maintaining. WebWork is a framework for web-application development that has been included in Struts framework 2.0 release. It has some unique concepts and constructs like its compatibility of working within existing Web APIs in Java rather than trying to replace them completely. It has been built specifically taking into account the developer's productivity and code simplicity. Furthermore it is completely context dependent that provides a wrapper around XWork. When working on web applications the web work provides a context that helps web developer in specific implementations. While, XWork provides a mechanism that is used for configuration and factory implementation management. This mechanism is dependencies inject mechanism. Struts and webwork has joined together to develop the Struts 2 Framework. Struts 2 Framework is very extensible and elegant for the development of enterprise web application of any size. Here we are going to explain you the architecture of Struts 2 Framework.Request Lifecycle in Struts 2 applications:
Image: Struts 2 high level overview of request processing: 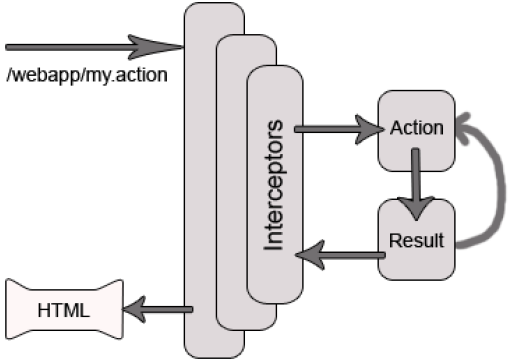 Struts 2 ArchitectureStruts 2 is a very elegant and flexible front controller framework based on many standard technologies like Java Filters, Java Beans, ResourceBundles, XML etc. For the Model, the framework can use any data access technologies like JDBC, EJB, Hibernate etc and for the View, the framework can be integrated with JSP, JTL, JSF, Jakarta Velocity Engine, Templates, PDF, XSLT etc. Exception Handling:The Struts 2 Framework allows us to define exception handlers and inceptors.
Struts 2 ArchitectureThe following diagram depicts the architecture of Struts 2 Framework and also shows the the initial request goes to the servlet container such as tomcat, which is then passed through standard filer chain. Image: Struts 2 Architecture The filter chain includes:
Then the Interceptors are executed again in reverse order. Finally the response returns through the filters configured in web.xml file. If the ActionContextCleanUp filter is configured, the FilterDispatcher does not clean the ThreadLocal ActionContext. If the ActionContextCleanUp filter is not present then the FilterDispatcher will cleanup all the ThreadLocals present. Why Struts2:The new version Struts 2.0 is a combination of the Sturts action framework and Webwork. According to the Struts 2.0.1 release announcement, some key features are:
The framework provides a set of tags to help you ajaxify your applications, even
on Dojo. The AJAX features include:
Comparison between Struts1 and Struts2:we are going to compare the various features between the two frameworks.Struts 2.x is very simple as compared to struts 1.x, few of its excelent features are:
FAQ'S
|
